Motorcycle handlebar grips are an essential part of your bike’s control system. Over time, they can become worn out or damaged, affecting your grip and overall riding experience. Fortunately, replacing them is a straightforward process that you can do yourself with a few tools and some patience. In this article, we will guide you through the step-by-step process of replacing your motorcycle handlebar grips.
Choose the Right Grips
Before you begin, it is crucial to choose the right grips for your motorcycle. Grips come in different sizes, materials, and styles, so be sure to select ones that are compatible with your bike’s handlebars. You can find a wide variety of grips at motorcycle accessory stores or online retailers. Take into consideration factors such as comfort, durability, and aesthetics when making your selection.
Prepare the Necessary Tools
To replace your motorcycle handlebar grips, you will need a few tools, including a flathead screwdriver, grip glue or adhesive, and a utility knife or scissors. It’s important to gather all the necessary tools beforehand to ensure a smooth and efficient process.
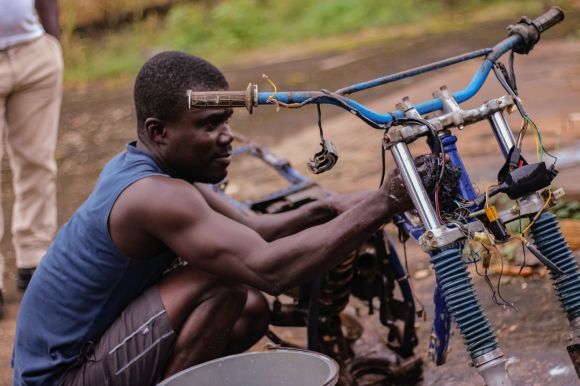
Remove the Old Grips
To begin, remove the old grips from your handlebars. Start by using a flathead screwdriver to pry off the end caps on the grips. Once the end caps are removed, you should be able to easily slide the old grips off the handlebars. If they are stuck, you can use a utility knife or scissors to carefully cut them off.
Clean the Handlebars
Once the old grips are removed, take the opportunity to clean the handlebars thoroughly. Use a mild detergent or soapy water to remove any dirt, grime, or adhesive residue. A clean surface will ensure better adhesion for the new grips.
Apply Grip Glue or Adhesive
Before installing the new grips, apply grip glue or adhesive to the handlebars. This will ensure that the grips stay securely in place. Follow the instructions on the glue or adhesive packaging for the best results. Apply a thin, even layer of glue or adhesive along the length of the handlebars, making sure to cover the entire surface where the grips will be placed.
Install the New Grips
With the glue or adhesive applied, it’s time to install the new grips. Start by aligning the grip with the handlebars and slowly slide it into place. Make sure it is positioned correctly and evenly along the handlebars. Use a twisting motion while sliding the grip to help it glide on smoothly. Be careful not to use excessive force, as it can damage the grips or handlebars.
Secure the Grips
Once the new grips are installed, secure them by pushing the end caps back into place. The end caps will help keep the grips in position and prevent them from sliding off during rides. Give the grips some time to dry and set, following the instructions on the grip glue or adhesive packaging.
Conclusion: Enjoy the Ride
In conclusion, replacing your motorcycle handlebar grips is a simple process that can greatly improve your riding experience. By choosing the right grips, preparing the necessary tools, and following the step-by-step instructions, you can easily replace your old, worn-out grips with new ones. Take the time to install them correctly and securely, and soon you’ll be back on the road, enjoying a comfortable and controlled ride.