The carburetor jets in a motorcycle play a crucial role in the fuel delivery system. Over time, these jets can become clogged with debris and affect the performance of the motorcycle. To ensure the smooth operation of your bike, it is essential to clean the carburetor jets regularly. In this article, we will guide you through the step-by-step process of cleaning motorcycle carburetor jets.
Gather the necessary tools and materials
Before you begin the cleaning process, make sure you have all the necessary tools and materials at hand. You will need a screwdriver set, a carburetor cleaner, a small brush, compressed air, safety glasses, and gloves. It’s important to protect your eyes and hands during this procedure.
Remove the carburetor from the motorcycle
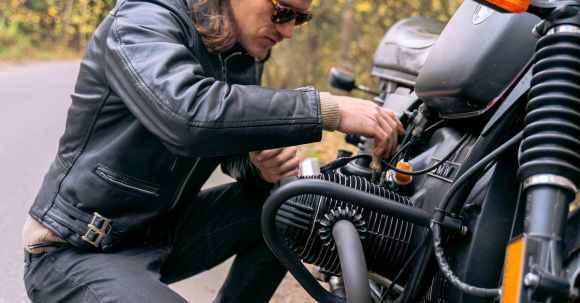
To access the carburetor jets, you will need to remove the carburetor from the motorcycle. Start by disconnecting the fuel line and the throttle cables. Use the screwdriver to remove the bolts that hold the carburetor in place. Carefully lift the carburetor away from the engine, taking note of any gaskets or seals that may be attached.
Disassemble the carburetor
Once the carburetor is removed, it’s time to disassemble it. Start by removing the float bowl, which is usually held in place by a few screws. Take note of the orientation and order of the parts as you remove them. Next, remove the jets from the carburetor body using a screwdriver. These jets are small and delicate, so handle them with care.
Clean the carburetor jets
Now that the carburetor is disassembled, it’s time to clean the jets. Spray carburetor cleaner directly onto the jets, making sure to remove any debris or buildup. Use a small brush to scrub the jets gently and remove any stubborn residue. Once the jets are clean, use compressed air to blow out any remaining debris. Ensure that the jets are completely clean and unclogged.
Clean the rest of the carburetor
While you have the carburetor disassembled, it’s a good idea to clean the other parts as well. Use carburetor cleaner and a brush to clean the float bowl and the carburetor body. Pay attention to any small passages or channels and make sure they are clear of any obstructions. Once everything is clean, use compressed air to blow out any remaining debris.
Reassemble and reinstall the carburetor
After cleaning the carburetor, it’s time to put everything back together. Start by reinserting the jets into the carburetor body, ensuring they are properly seated. Then, reattach the float bowl and tighten the screws. Carefully reinstall the carburetor onto the engine, making sure to reconnect the throttle cables and the fuel line. Tighten the bolts to secure the carburetor in place.
Test the motorcycle
With the carburetor reinstalled, it’s time to test the motorcycle. Start the engine and let it idle for a few minutes. Pay attention to any changes in performance or any unusual sounds. Take the motorcycle for a short ride and see if it runs smoothly and accelerates without hesitation. If everything seems fine, then you have successfully cleaned the carburetor jets.
In conclusion
Cleaning the carburetor jets is a simple yet essential maintenance task for any motorcycle owner. By following the step-by-step process outlined in this article, you can ensure that your motorcycle runs smoothly and efficiently. Regular cleaning of the carburetor jets will help maintain the performance and longevity of your bike. So, don’t neglect this important maintenance task and enjoy a trouble-free ride!